
Update May 2022:
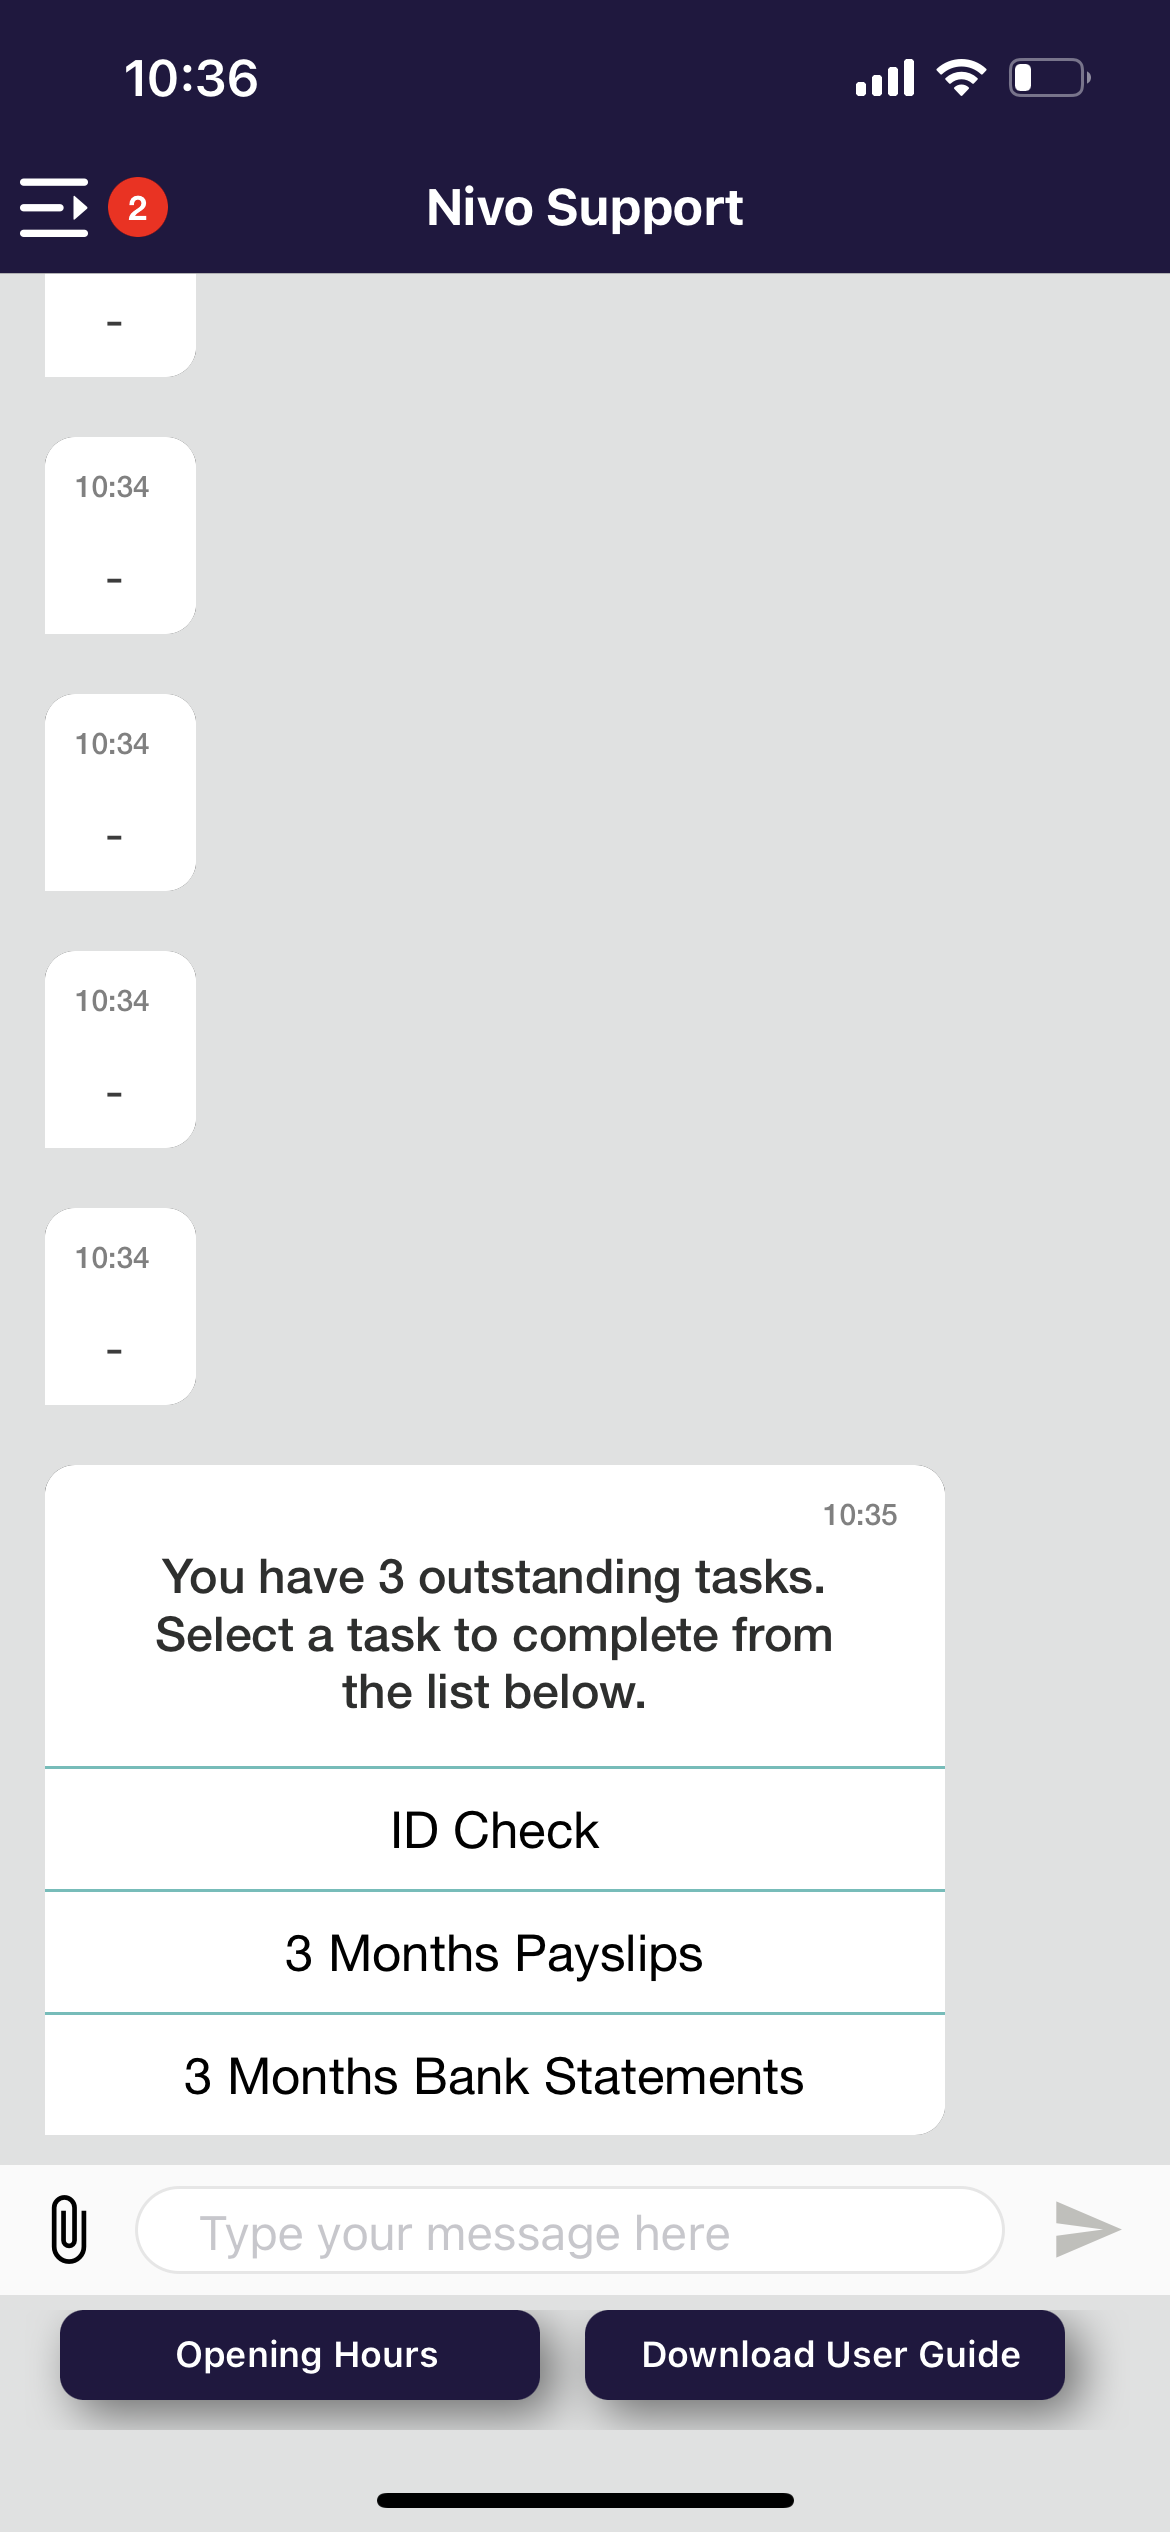
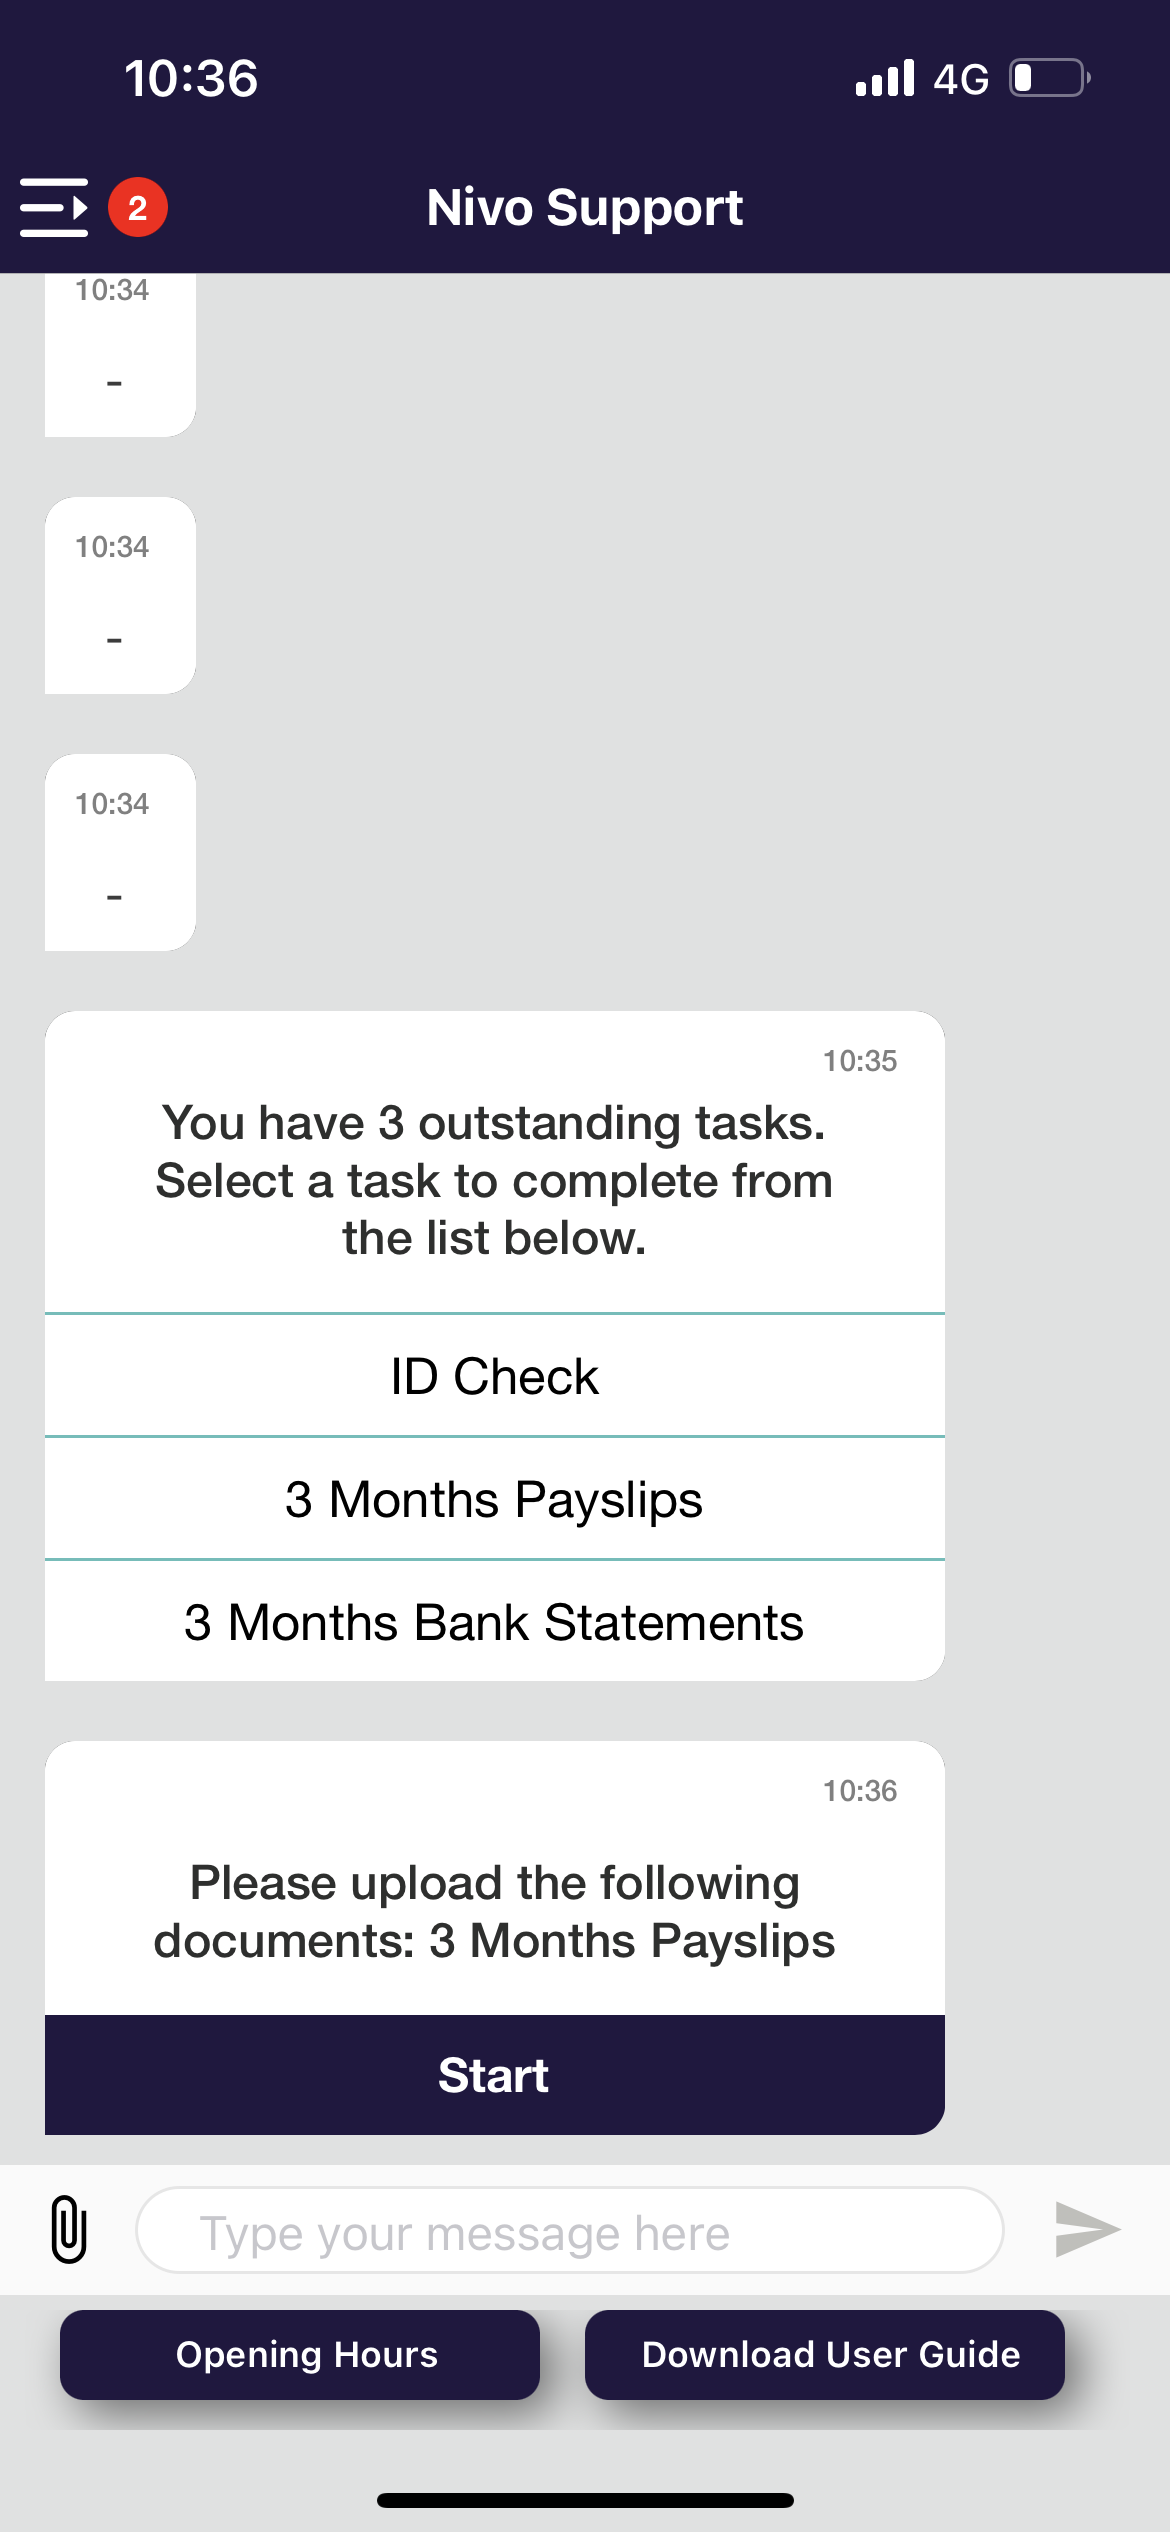
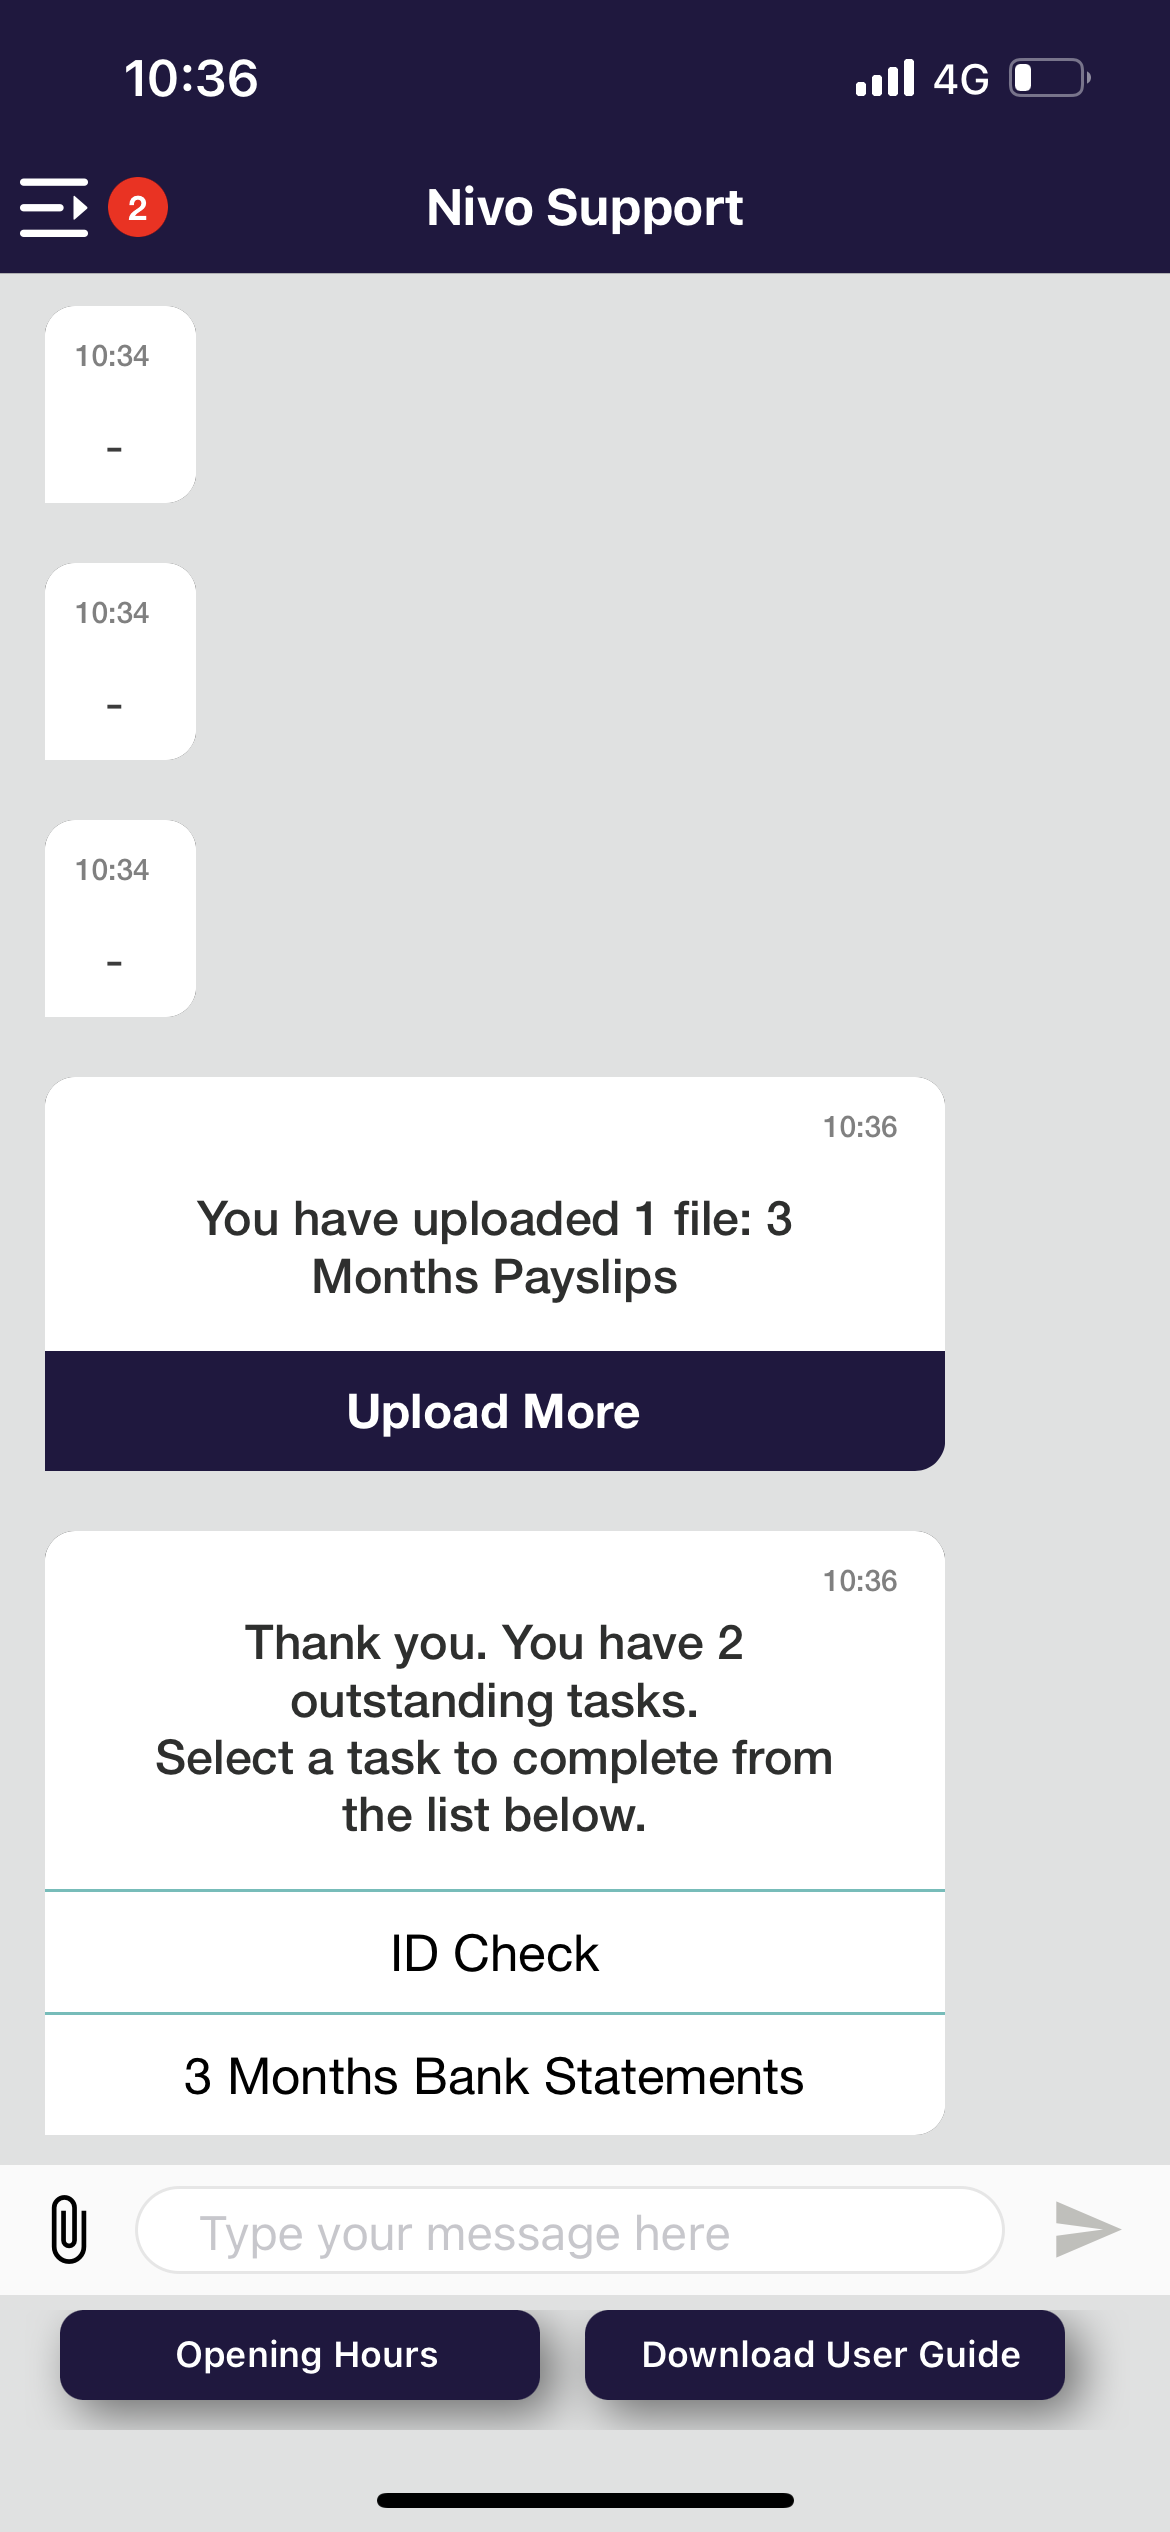
When using checklists, the items that you send to the customer appear as a defined task list in their message thread. As the customer completes the items in the task list, the task lists updates and appears as the most recent message in the thread. This means that customers do not have to scroll through to past messages to see if there are any outstanding items.
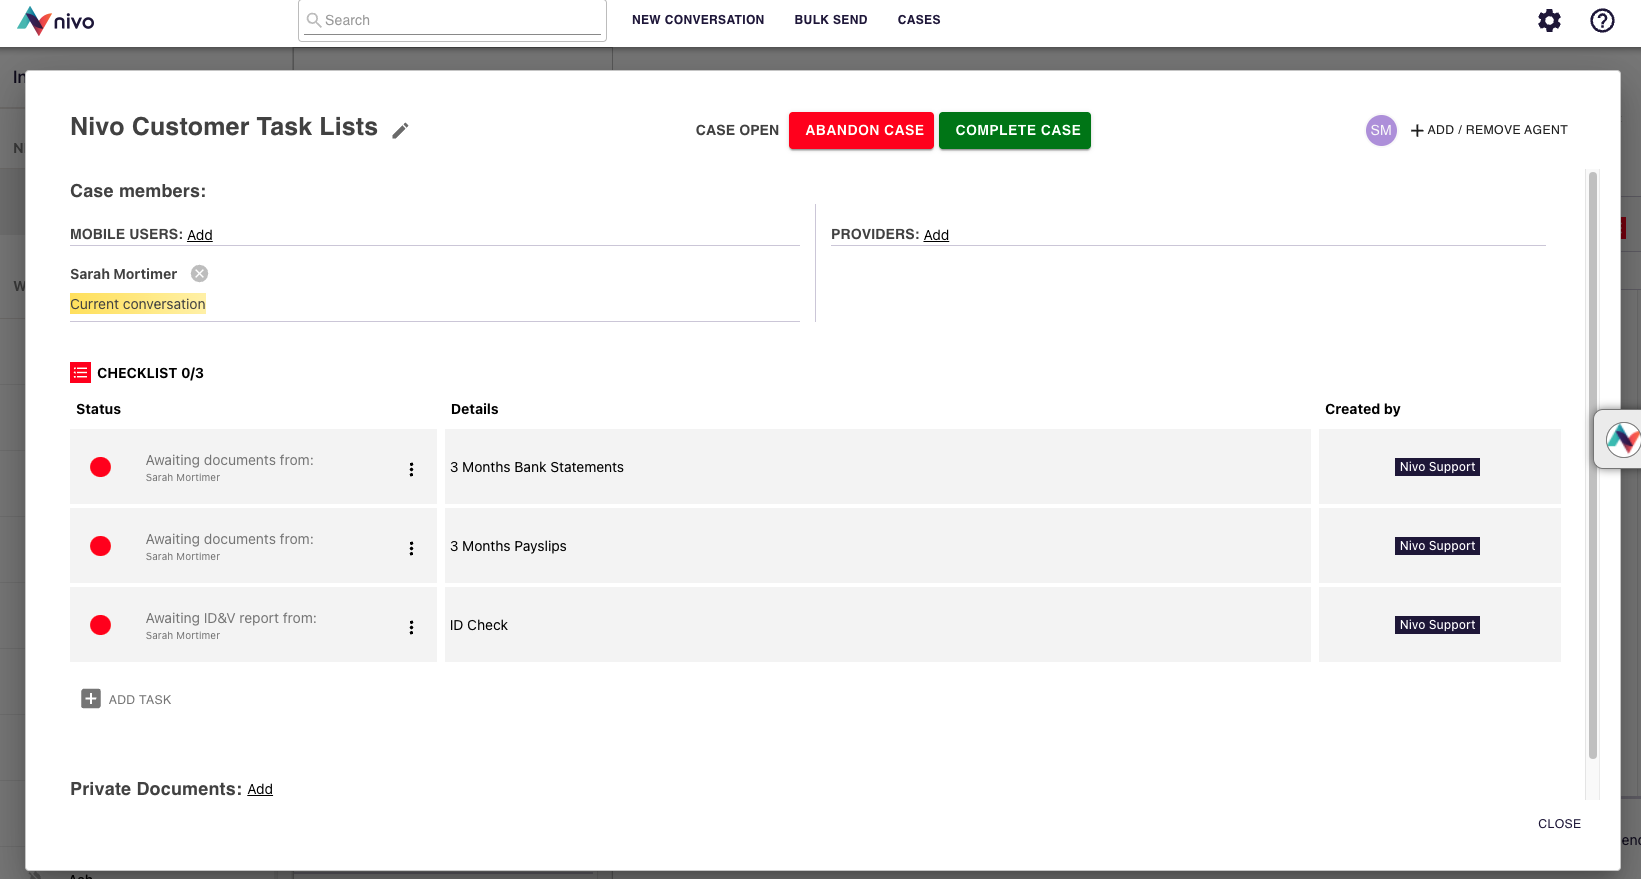
Image 1: Items set in checklist in Nivo console
Images 2,3 & 4: How the checklist items appear to the customer in the app; once a customer selects a checklist item to complete; after the customer has completed a checklist item
----------------
Summary
The way to create and manage checklists is within the case menu screen. New features include being able to create a checklist item for an e-signature document and send that document from within the checklist and case menu.
----------------
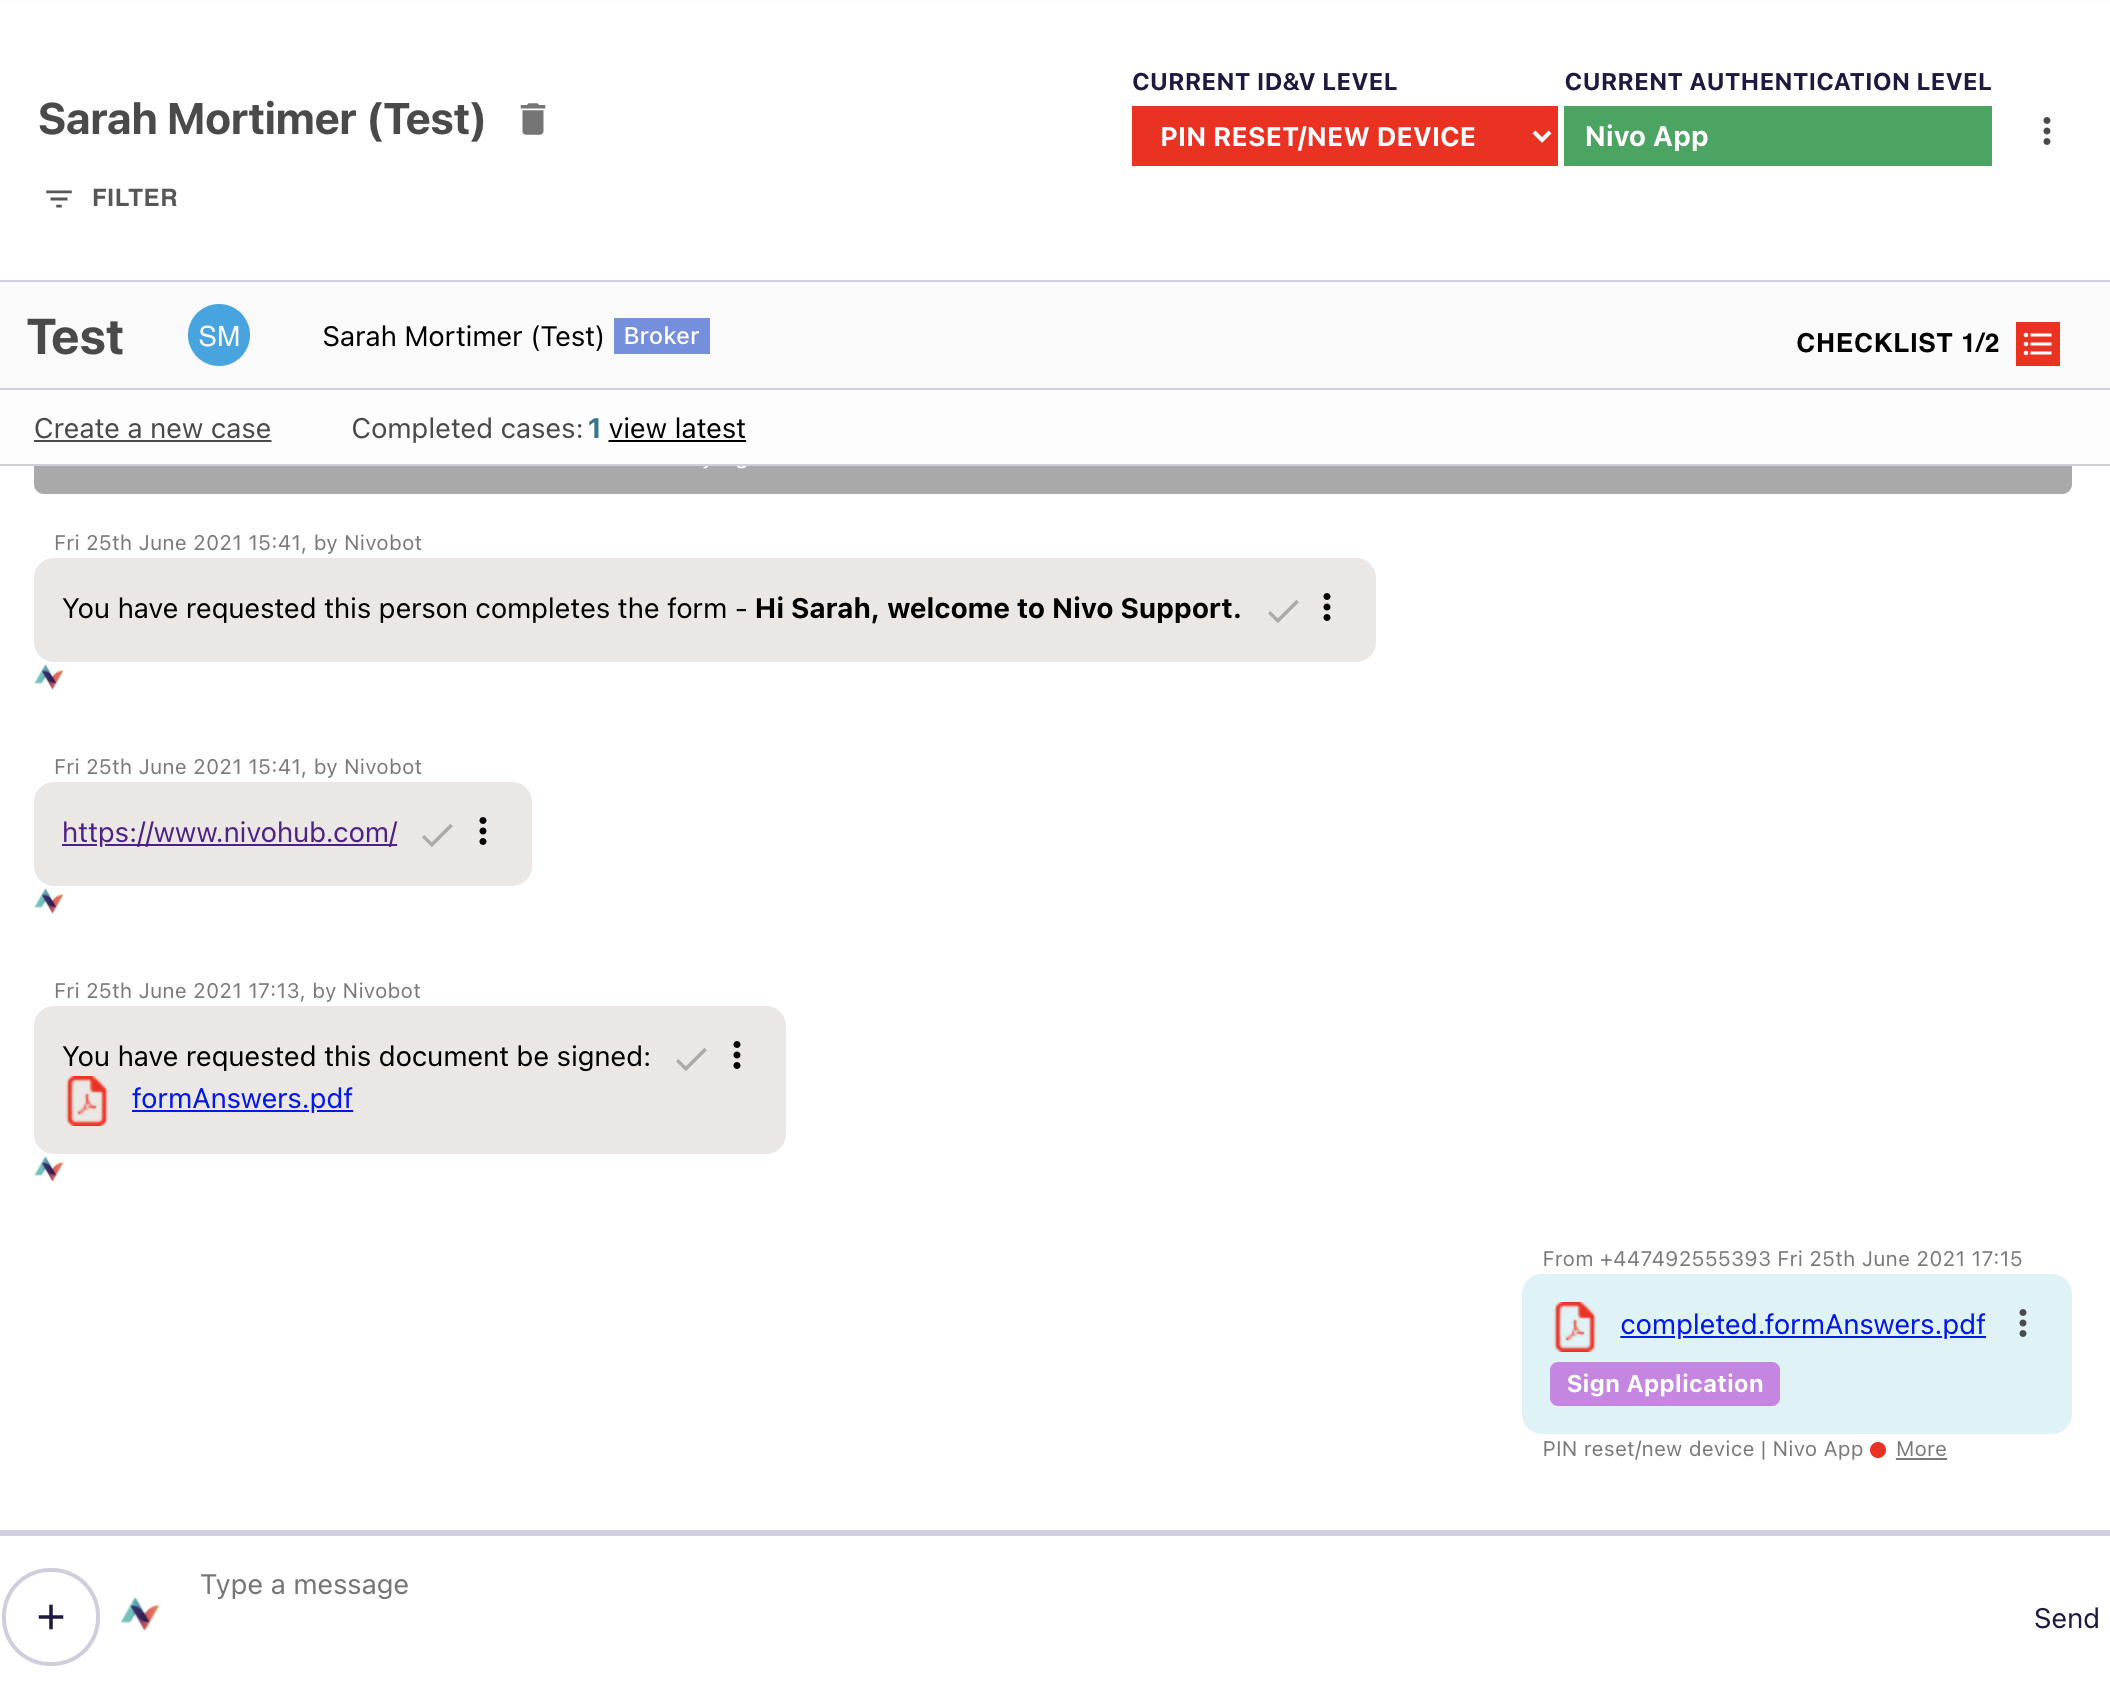
Checklists
Changes have been made on how agents can create and manage checklists within a case.
Checklists are part of a case, and are accessible within the case management screen, as well as from the case bar in the conversation.
Agents will be able to create standard checklists items or configure checklists items specifically as e-signature items, allowing them to configure and send e-signatures from within the case menu. The checklist status also reflects if items are currently awaiting signature, and when the signature has been completed.
To access checklists:
1. Navigate to a conversation.
2. Create a case, if one is not already created.
3. Open the case by clicking anywhere on the case bar at the top of the conversation, or by clicking the checklist icon on the right hand side.
4. In the case view, add items to the checklist as needed.
To configure checklist items as e-signature items:
1. Follow instructions as above.
2. Once you have a checklist item configured, select the vertical 3 dots on the right hand side of the status bar.

3. From the menu, select 'E-sign settings'
4. Upload the PDF document for signing.
5. Select the relevant template. (Note: A template will need to be made before configuring the checklist item as an e-signature type).
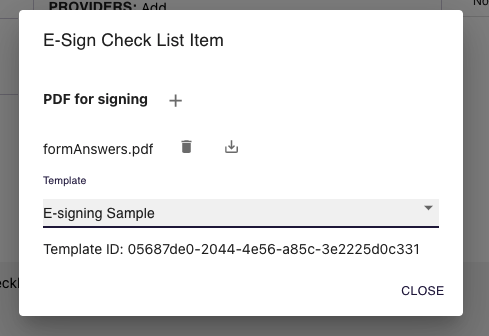
6. Once a template is selected, press 'Close' in the bottom right hand corner.
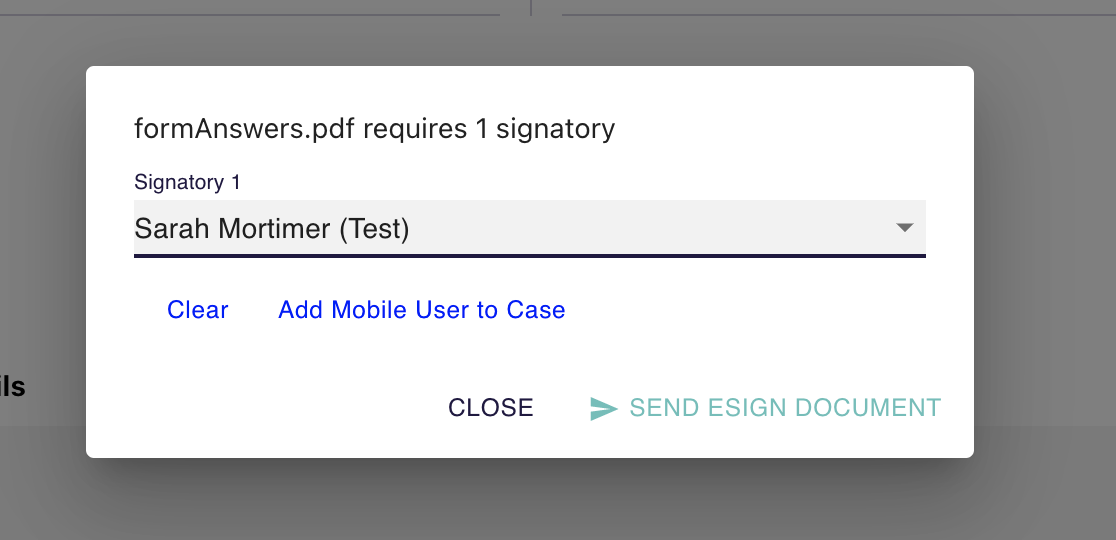
7. You will now see a link that says 'Send for signature' in the status column of your checklist item. Select 'Send for signature'.

8. Select the signatory (or signatories).
9. Click 'Send esign document'
10. The status column will now reflect that the document is awaiting signature and from whom.
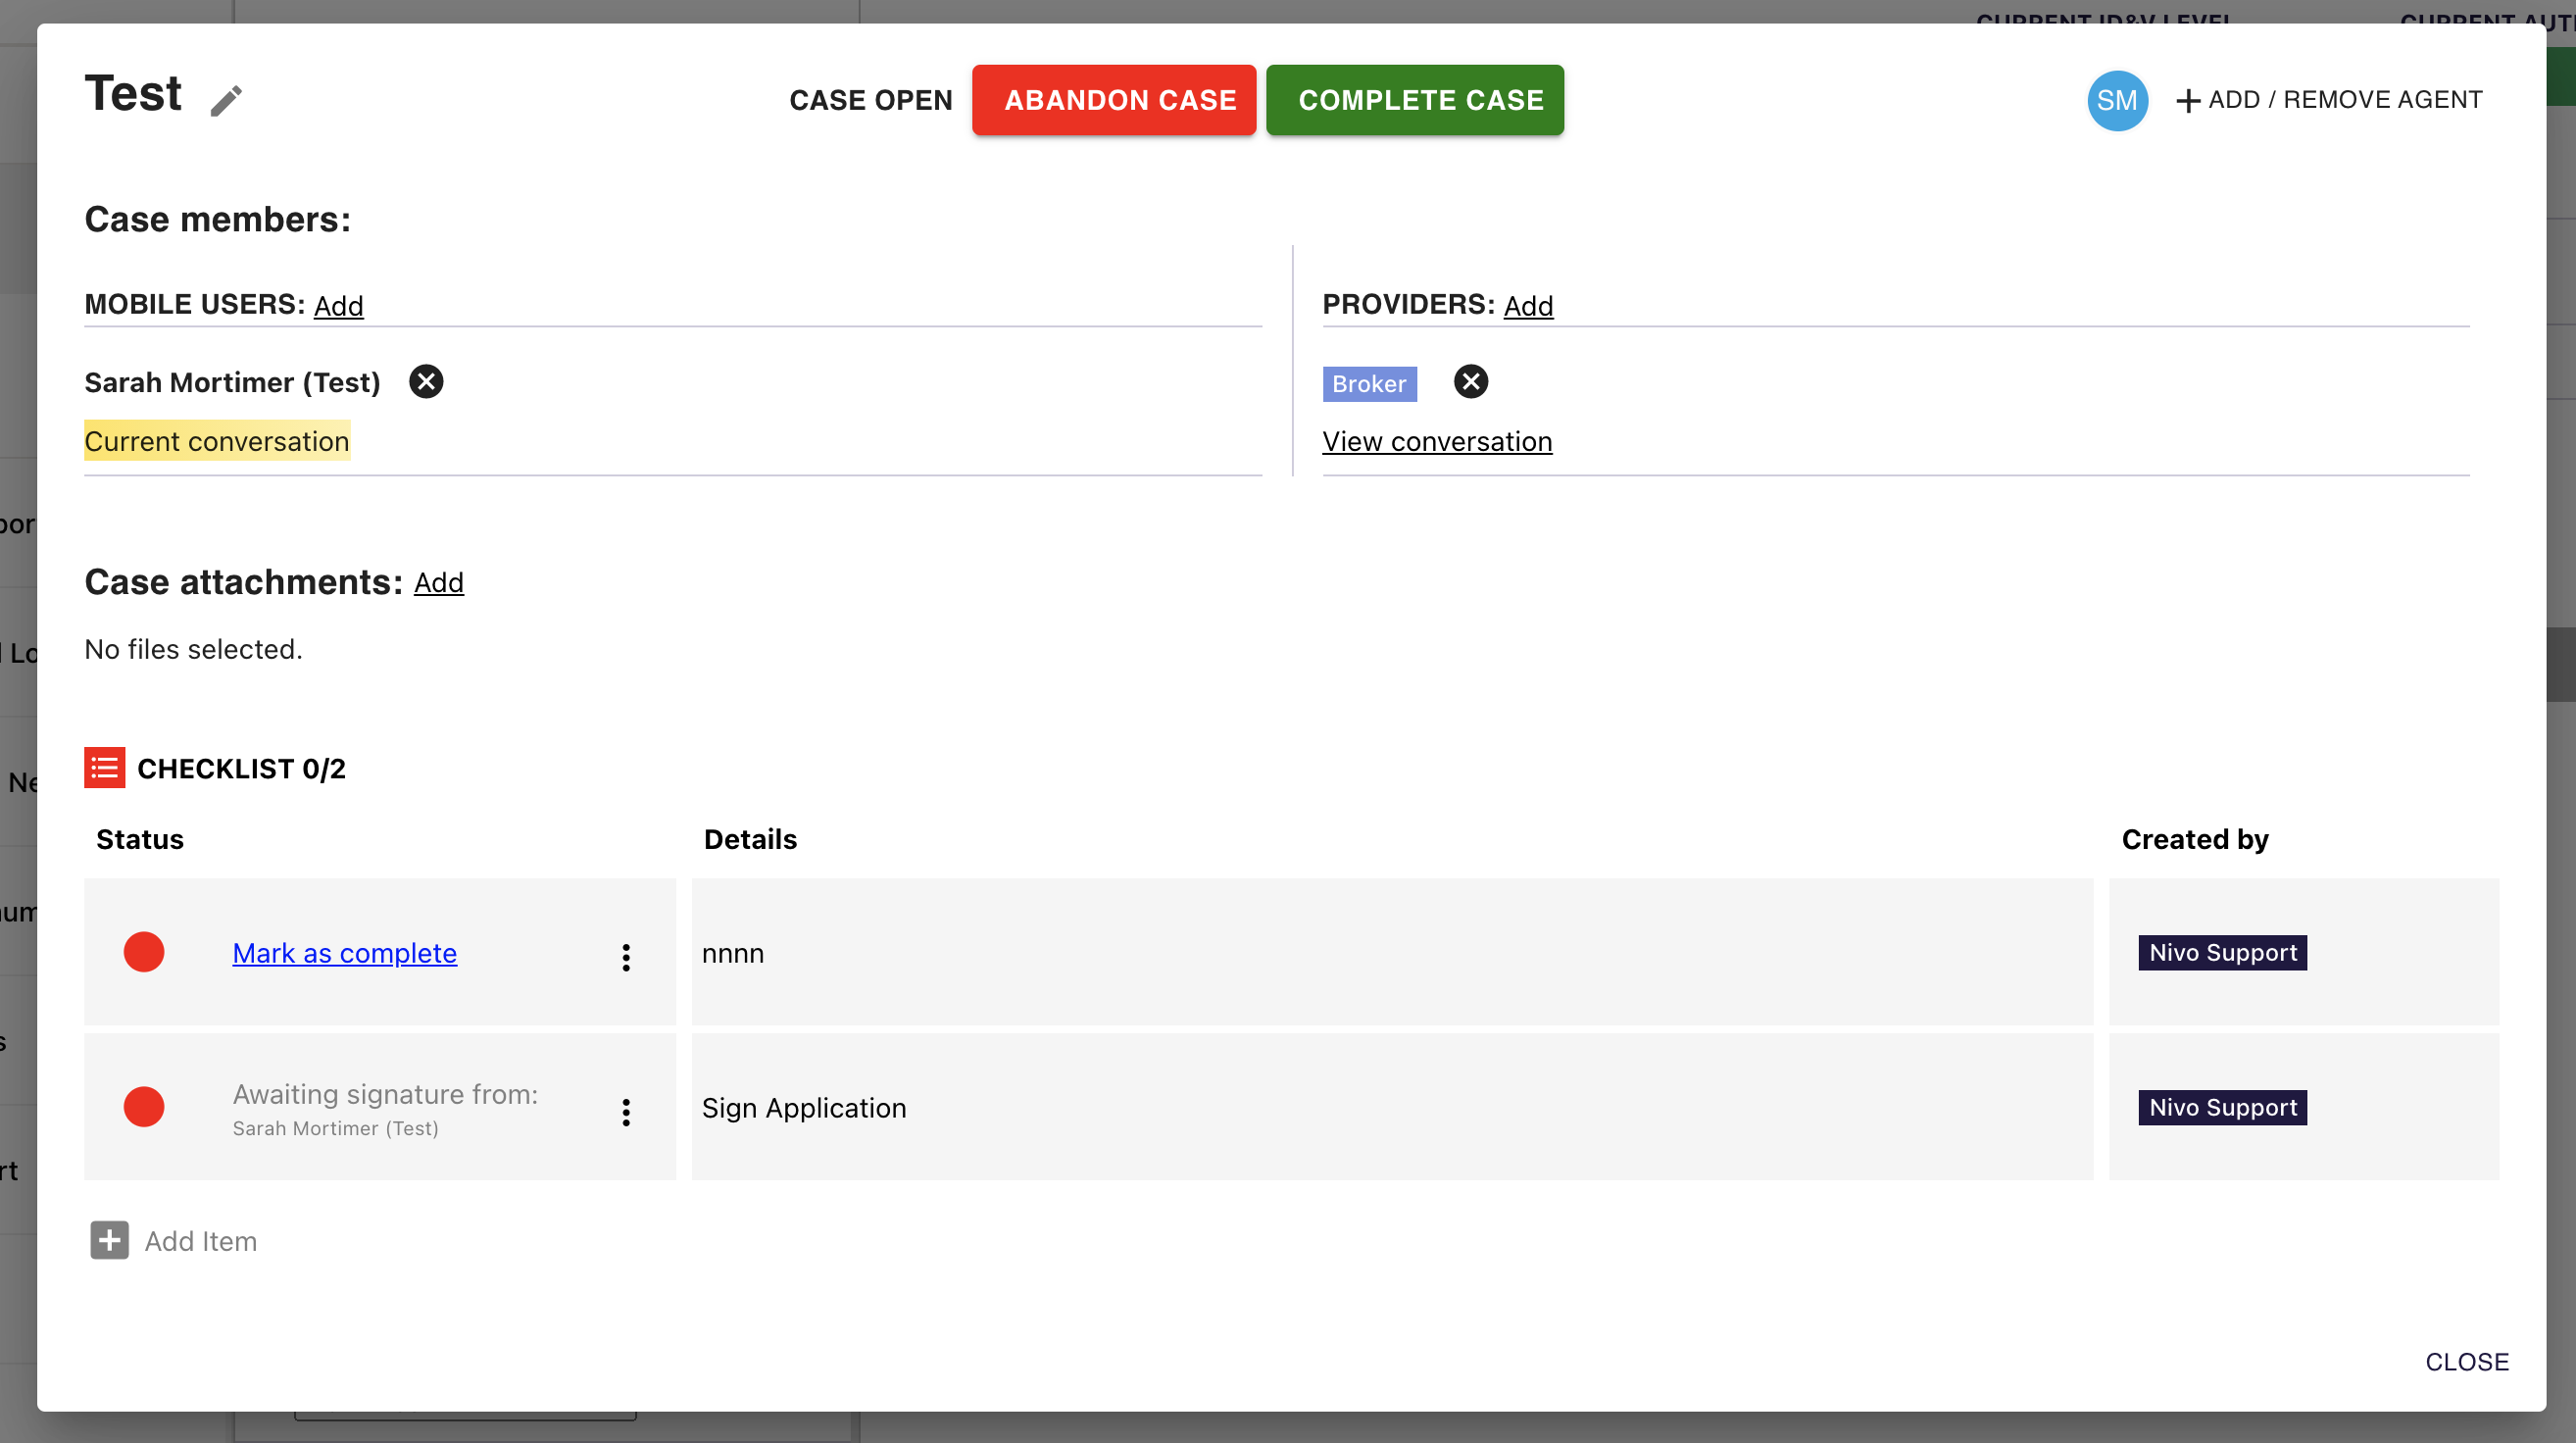
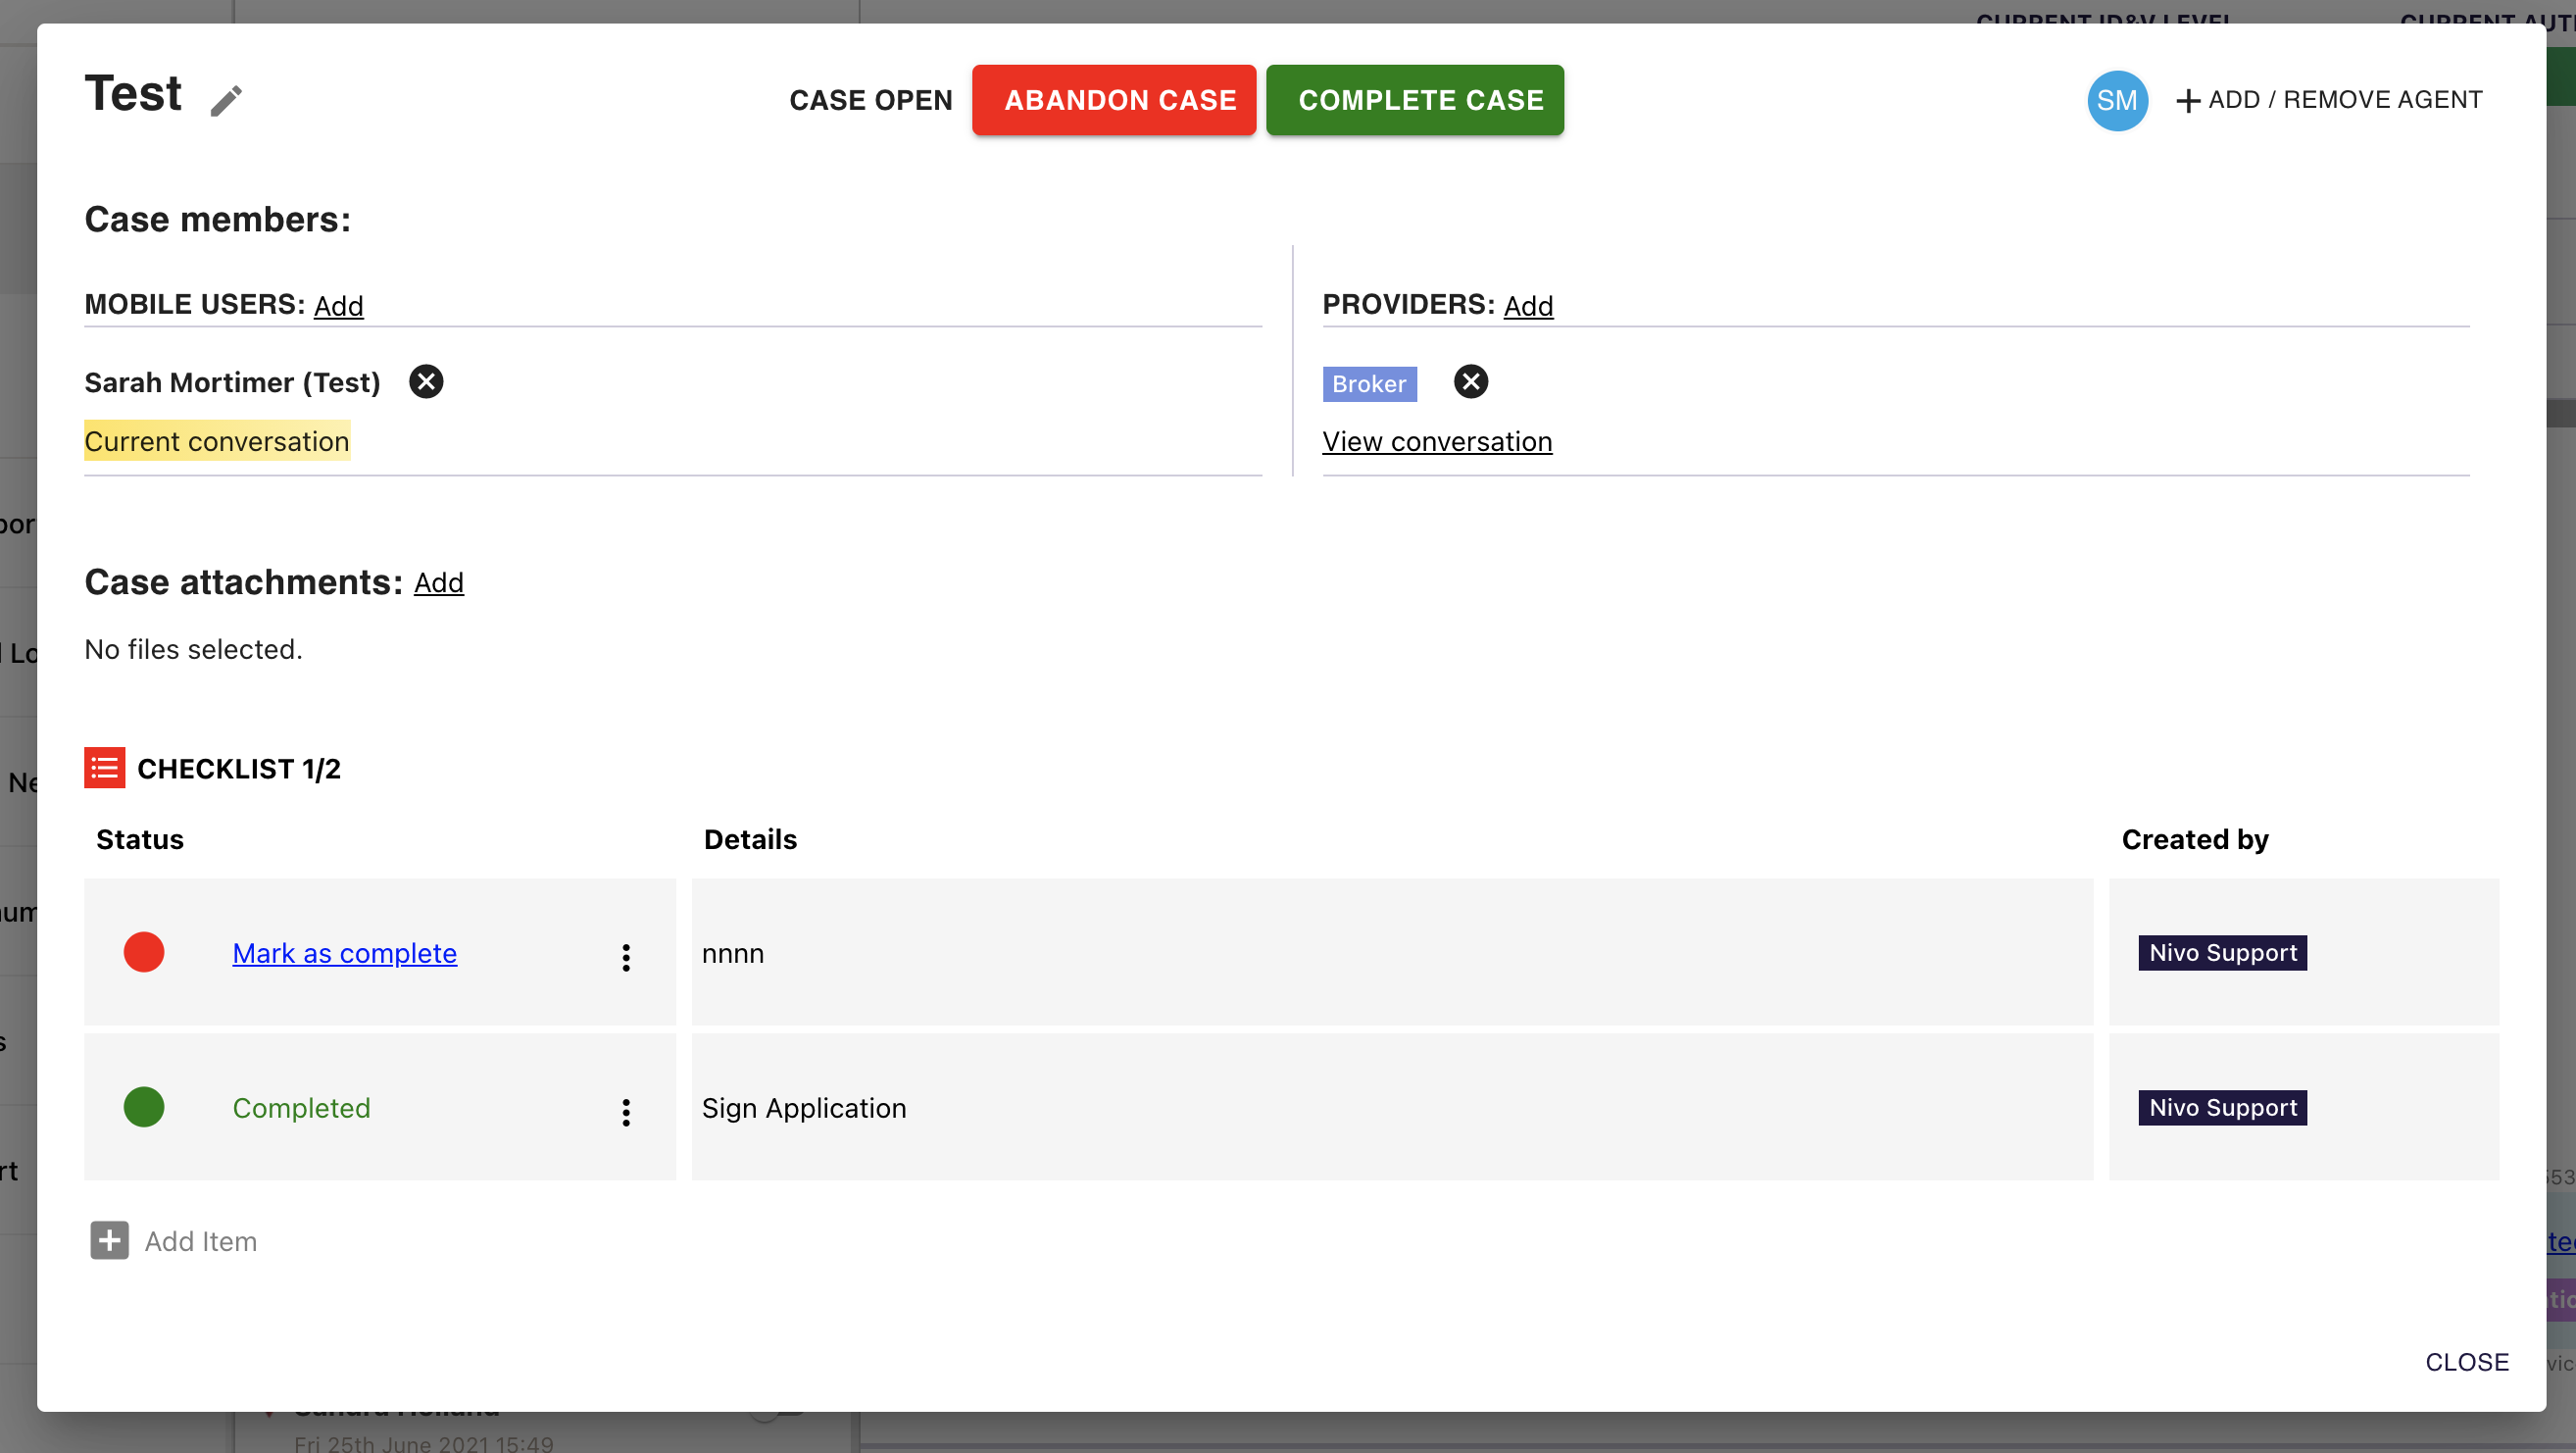
11. Once the client has signed the document, the status column will change to 'Completed'.
Additionally, the document in the conversation will be labelled with the name of the checklist item, allowing the agent to filter on checklist items related to the case within the conversation.
Comments
0 comments
Article is closed for comments.